Table of Contents
ToggleOwning an Amana dishwasher means having a reliable appliance that can handle years of daily dishes, but only if you know how to use it properly. Many homeowners grab their manual once, toss it in a drawer, and wing it from there. That’s a missed opportunity. Understanding your dishwasher’s specific cycles, controls, and maintenance routines doesn’t just make cleaning easier: it extends the life of the machine and ensures sparkling results every cycle. This guide walks you through everything in your Amana dishwasher manual, from that first unboxing moment through everyday operation and common fixes. Whether you’re setting up a new unit or rediscovering features on an existing one, you’ll find straightforward answers and practical steps ahead.
Key Takeaways
- Proper Amana dishwasher setup—including leveling, correct hose connections, and a test cycle—prevents leaks and ensures reliable operation from day one.
- Understanding your dishwasher’s wash cycles (Normal, Heavy, Quick, Eco, and Sanitize) allows you to match cleaning power to soil levels and save energy on lightly soiled loads.
- Correct loading and avoiding blocked spray arms is the single biggest factor in cleaning performance; place items strategically to maximize water spray access.
- Detergent and rinse aid are essential—hard water areas especially benefit from rinse aid to eliminate spotting and streaking on dishes.
- Common issues like poor cleaning, water pooling, and unusual noises can be resolved by clearing spray arm clogs, checking connections, and inspecting the filter before calling a technician.
- Consulting your Amana dishwasher manual’s error code chart and troubleshooting section saves time and helps you quickly identify whether an issue requires professional service.
Getting Started: Unboxing and Initial Setup
When your Amana dishwasher arrives, resist the urge to fire it up immediately. Proper setup prevents leaks, electrical issues, and warranty headaches down the road.
Start by inspecting the unit for shipping damage. Check the sides, back, and interior for dents, cracks, or loose components. Take photos if you spot anything, this matters for warranty claims. Remove all packaging materials, foam blocks, and plastic wrapping from inside the tub and around the exterior. These items can jam spray arms or block water flow.
Position the dishwasher in its cabinet opening. Most Amana models require ¾ inch of clearance on either side and 3 inches behind for proper plumbing and electrical connections. If your cabinet isn’t perfectly square (common in older homes), use shims under the front legs to level the unit side-to-side and front-to-back. A level dishwasher drains properly and operates quietly.
Next, connect the inlet hose to the hot water supply under your sink. Use a female-to-female connector with thread tape (plumber’s tape) wrapped clockwise three times around the threads, this prevents leaks at the connection point. Tighten snugly but not aggressively: over-tightening cracks fittings. Connect the drain hose to either the sink P-trap or a standpipe, depending on your plumbing setup. The drain line should have a slight upward curve where it exits the dishwasher to prevent siphoning.
Electrical connections vary. Some Amana dishwashers plug into a standard outlet: others require hardwiring to a dedicated 15-amp circuit. If hardwiring is needed and you’re not comfortable running electrical, hire a licensed electrician, this isn’t a DIY gray area. Once connected, run a test cycle (empty) to check for leaks at connections before loading dishes.
Understanding Your Control Panel and Cycles
Your Amana dishwasher’s control panel is the command center, and learning its layout saves frustration. Most models feature a touchpad or button interface across the top front, with a digital display showing selected cycle, time remaining, and error codes.
Wash Cycle Options Explained
Amana designs cycles for different soil levels and material types. The Normal Wash cycle, your everyday workhorse, uses medium water temperature and pressure for lightly soiled dishes. It runs roughly 2.5 to 3 hours and suits most weeknight loads.
The Heavy or Pots & Pans cycle turns up the heat and extends the wash time for baked-on food and cast iron cookware. Water temperature climbs higher (often 140°F or above), and spray arms work longer. Use this weekly if you bake frequently or have stubborn residue.
Quick Wash or Express cycles finish in under 30 minutes and work for lightly soiled dishes or when you need clean plates fast. But, they skip the dry cycle on some Amana models, so you’ll hand-dry or let dishes air-dry.
The Eco or Energy Save cycle reduces water and heat to meet energy standards. It runs longer (sometimes 4+ hours) but uses less electricity and water. It’s perfect for lightly soiled loads and aligns with standards set by smart home technology reviews tracking appliance efficiency.
Sanitize or Sanitizing cycles reach 160°F or use prolonged heat to eliminate bacteria, useful for baby bottles, cutting boards, or loads during illness.
Reading and Using the Control Display
The display shows the selected cycle name and estimated time. Most Amana models let you adjust temperature, drying options, and delay start via buttons or a touchpad. Pressing the cycle button cycles through options: holding it typically locks your selection. If your display flashes or shows error codes (like E1, E2, or E4), consult the troubleshooting section of your manual, these indicate specific mechanical or sensor issues.
Delay start is genuinely useful: you can load dishes, set the cycle to run at 2 a.m. when your electricity rate drops or when you want morning dishes ready. Select the cycle, then press the delay button and set hours (usually up to 24). The unit counts down and starts automatically.
Loading and Preparing Your Dishes Properly
Loading correctly is the single biggest factor in cleaning performance. Even the best cycles fail if dishes block water spray.
Remove large food debris, bones, sauces, peels, before loading. You don’t need to pre-rinse lightly soiled dishes (modern detergents work better with some soil present), but dried-on food particles can clog filters or recirculate during the cycle. A quick scrape with a fork handles most situations.
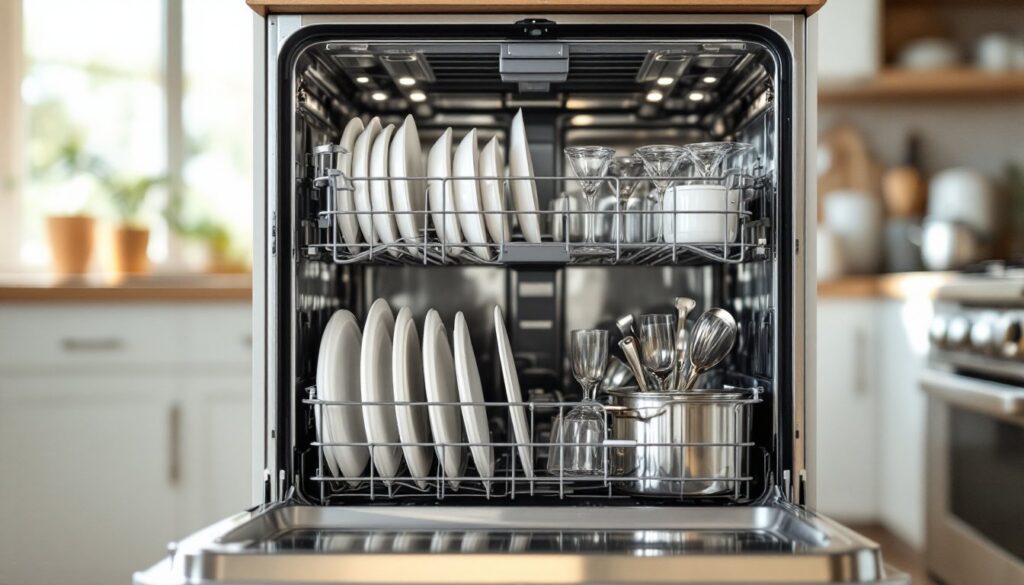
Place plates and bowls in the lower rack, tilted slightly toward the center so water hits both surfaces. Don’t stack plates flat: let them lean at an angle. In the upper rack, load glasses, cups, and smaller items. Avoid clustering items, give each piece airflow and spray access. If items touch, water can’t reach both surfaces.
Large cookware (pots, baking sheets, sheet pans) goes on the lower rack, usually at the sides, where they don’t block the spray arms from rotating freely. This is non-negotiable: a jammed spray arm means the entire load gets subpar cleaning. Pots handle high heat: glasses and plastic don’t, so segregate by material type.
If your Amana has a folding tine basket or convertible upper rack, adjust it to match your load. Some cycles use higher water levels: a flexible rack adapts without wasting space. Place plastic and delicate items (wine glasses, antique china) in the upper rack where water pressure is gentler.
Check that the spray arms rotate freely by spinning them by hand. If anything touches, rearrange. Never overload: a cramped dishwasher cleans poorly and dries worse. Fill capacity is roughly 12 to 14 place settings depending on your model, but stuffing 16 in guarantees mediocre results.
Adding Detergent and Rinse Aid
Detergent and rinse aid are not optional upgrades, they’re essential for a spotless finish. Open the detergent dispenser on the inside of the door (usually near the upper rack or lower front). It’s a small compartment with a flip or slide lid. Add detergent powder, liquid, or a pod according to your machine’s instructions. Most Amana models use around 1 tablespoon of powder or 1 pod per cycle. Hard water areas may need slightly more: soft water areas may use less.
The dispenser closes securely so detergent releases at the right time during the wash cycle. Don’t exceed the fill line: excess detergent doesn’t clean better and leaves residue on dishes.
Rinse aid is a different product. It’s a slippery liquid that helps water sheet off dishes during the rinse phase, leaving no spotting or streaking. Locate the rinse aid dispenser, usually a separate, smaller compartment near the detergent or inside the lower rack. Fill it with the rinse aid liquid until the indicator shows full (often a translucent level window). Rinse aid lasts weeks or months depending on hardness: refill when the indicator empties.
Hard water, water with high mineral content, is rinse aid’s best friend. If your area has hard water, rinse aid becomes almost mandatory for streak-free results. Conversely, soft water sometimes doesn’t benefit as much, but it rarely hurts. Hard water testing kits are inexpensive: test strips reveal your water hardness in seconds. Many dishwasher detergent products reviewed on expert cleaning sites highlight compatibility with various water hardness levels.
Store detergent and rinse aid in a cool, dry spot away from humidity. Powder tends to clump if exposed to moisture: liquid can separate. Keep the manual’s recommended product types handy, some Amana models specify compatible detergent formulations.
Troubleshooting Common Issues
Problems happen, but most are simple fixes before you call a technician.
Poor cleaning or spots and streaks: First, check detergent and rinse aid levels. If both are adequate, inspect the spray arms underneath the upper rack and on the lower rack bottom. Remove them (they usually twist off) and use a toothpick or small wire to clear any mineral deposits or debris blocking the spray holes. Lime buildup in hard-water areas clogs these holes. Soak spray arms in white vinegar for 30 minutes if heavily clogged, then rinse and reinstall.
Water pooling on the floor: Check connections at the inlet hose and drain hose first. A loose fitting leaks. Tighten (don’t over-tighten) or replace washers if damaged. If the drain hose is the culprit, verify it’s routed correctly, it should rise before entering the sink P-trap to prevent siphoning. If water leaks from inside the door, the door seal may be dirty or warped. Wipe it with a damp cloth and check for cracks. Warped seals require replacement, which is user-serviceable on many Amana models (consult your manual).
Dishes not drying or still wet: Open the dry dispenser or drying-agent chamber and ensure it’s filled. If dry cycles are off, select a cycle with heated or air-dry options enabled. Power drying uses more energy but delivers faster results. In humid kitchens, cracking the dishwasher door slightly after the cycle ends lets heat escape and air-dry dishes faster.
Unusual noises: Grinding or rattling usually means foreign objects (a fork, shard of glass, or small stone) are trapped in the filter or pump. Stop the cycle immediately. Open the door, remove the lower rack, and lift out the fine filter (cylindrical basket at the tub bottom). Inspect and clear debris. Grinding that persists after cleaning warrants a service call.
Error codes: Display codes like E1, E4, or E20 indicate sensor or mechanical failures. Your manual’s code chart translates these. Common codes (like E2) often point to a blocked drain or filter: run a cycle with no dishes and inspect the filter. Codes tied to water inlet or heating elements require professional service.
Strange odors: This usually means the filter or spray arm passages are harboring mold or bacteria. Clean the filter thoroughly and run an empty cycle with a dishwasher cleaning agent (citric acid-based products work well). Some homeowners use white vinegar in the detergent dispenser, though this can affect rubber seals over time, use it sparingly or opt for commercial dishwasher cleaners.
If a problem persists after troubleshooting, contact Amana customer support with your model number (found on a label inside the door frame) and error code handy.