Table of Contents
ToggleA small kitchen doesn’t have to feel like a compromise. Homeowners often believe a meaningful kitchen remodel requires tearing out cabinets, replacing appliances, and spending $50,000 or more, but that’s a myth. Many of the most dramatic before-and-after transformations happen when DIYers focus on high-impact, budget-friendly updates that address what actually bothers them daily. Whether it’s dim lighting, cramped storage, or tired finishes, a strategic remodel on a modest budget can deliver restaurant-quality results. This guide walks through real planning strategies, cost-saving material swaps, and honest DIY versus professional trade-offs that help homeowners maximize every dollar spent on their kitchen.
Key Takeaways
- A strategic small kitchen remodel can cost $5,000–$20,000 when focused on high-impact, budget-friendly updates rather than expensive structural changes.
- Paint, hardware swaps, and lighting upgrades deliver outsized visual impact for $200–$600 and are excellent starting points for any budget kitchen remodel.
- Maximize existing storage with pullout organizers, wall-mounted racks, and vertical shelving before considering expensive cabinet replacement.
- Choose budget-friendly countertop and flooring alternatives like laminate ($30–$60/sq ft), luxury vinyl plank ($3–$8/sq ft), or peel-and-stick backsplash tiles to reduce costs without sacrificing durability.
- DIY cosmetic work like painting and backsplash installation to save 30–40% in labor costs, but hire licensed professionals for plumbing, electrical, and gas work to ensure safety and code compliance.
- Set a realistic budget tier system, allocate 10–15% for unforeseen issues, and prioritize based on daily frustrations—not cosmetic wishes—to prevent overspending.
Planning Your Budget-Friendly Kitchen Remodel
Before buying a single item, take a hard look at what’s actually broken, worn, or frustrating in your space. A remodel without a clear budget and priority list spirals fast. Start by photographing every angle of your kitchen, walls, cabinets, counters, appliances, and make three lists: non-negotiables (things that must change), nice-to-haves (things that would improve function or appearance), and wish-list items (cosmetic flourishes). Be honest. If your cabinet doors are solid but just dated, a paint job and new hardware might solve it. If your sink or range is reliable, replacing it wastes budget dollars that could go elsewhere.
Setting Realistic Budget Targets And Priorities
A true small kitchen remodel can range from $5,000 for strategic cosmetic updates to $20,000 for modest structural or appliance changes. Anything more typically involves Cabinet replacement, plumbing relocation, or electrical work, all things that demand permits and professional installation. Your budget ceiling depends on what you own versus rent, your timeline, and your tolerance for living in a construction zone.
Start with a tier system. Allocate roughly 30% to cabinetry or wall prep, 20% to countertops or backsplash, 20% to appliances and fixtures, 15% to flooring, and 15% to labor or contingency. These aren’t rigid rules, but they help prevent overspending in one category that starves another. Tools like ImproveNet’s renovation cost guides let you input your zip code and kitchen size to see what contractors actually charge in your region, invaluable for knowing whether your budget is realistic. Write your total budget down, add 10–15% for unforeseen issues (hidden water damage, outdated wiring, structural problems), and stick to it. When temptation strikes, cross-reference your priorities list. Does that fancy backsplash tile matter more than better lighting?
High-Impact, Low-Cost Kitchen Updates
Some upgrades deliver outsized visual impact relative to cost. These are often the first things to tackle in a budget remodel because they change how a space feels without major construction.
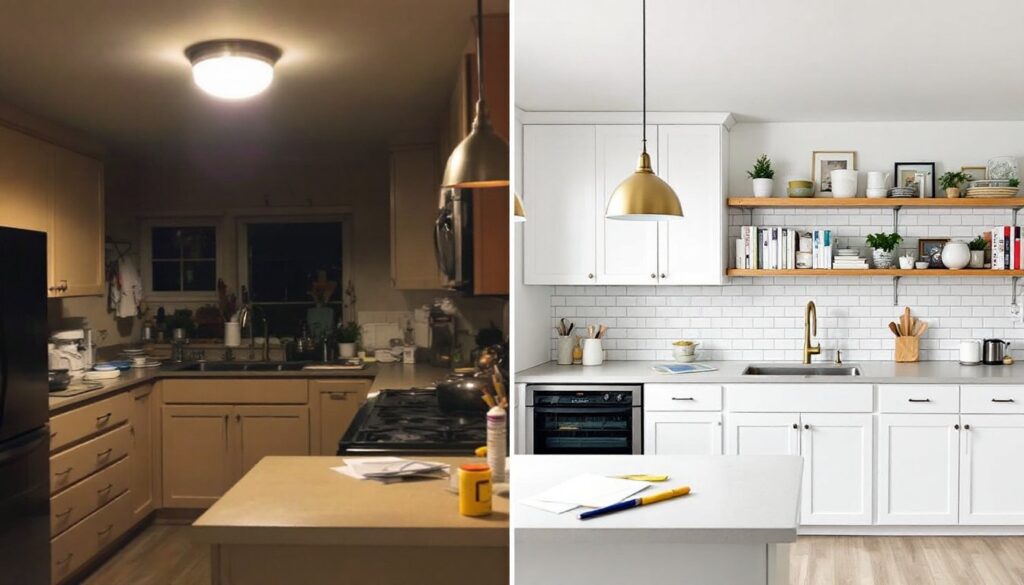
Paint, Hardware, And Lighting Upgrades
A fresh coat of paint on cabinet faces and walls costs $200–500 in materials and transforms a kitchen instantly. Choose a semi-gloss or satin finish paint formulated for cabinets (Benjamin Moore’s Advance or Sherwin-Williams ProClassic are industry standards). Prep is 90% of the work: remove hardware, clean and degrease cabinets with TSP (trisodium phosphate), lightly sand with 120–150 grit sandpaper, prime with a bonding primer, then apply two coats of paint. This takes 2–3 days of dry time between coats. Expect to invest $100 in a quality brush and roller: cheap tools leave bristles in your paint.
Swapping cabinet hardware, knobs, pulls, hinges, costs $50–200 total but looks like a $2,000 upgrade. Stainless steel pulls, matte black handles, or brushed brass all read “modern” or “farmhouse” depending on style. Measure center-to-center distances on existing holes to ensure new hardware fits: most standard cabinetry uses 35mm or 96mm spacing. If holes don’t align, you’ll need to fill and re-drill, which is doable but takes precision.
Lighting is where many old kitchens fail hardest. An outdated 60-watt incandescent flush mount makes even clean cabinets look dingy. Upgrading to a modern pendant trio over the sink, a neutral-white LED under-cabinet strip (2700K or 3000K color temperature), or recessed LEDs in soffits costs $200–600 installed and removes shadows where food prep happens. Under-cabinet lighting is a particularly smart DIY project: measure the run, buy an LED strip with an inline switch (brands like Hyperikon or Litehouse run $40–80 for a 10-foot kit), and attach with adhesive backing. Hardwire it to an outlet or switch if you’re comfortable with basic electrical: otherwise, hire a licensed electrician for an hour ($75–150) to integrate it safely.
Smart Storage And Layout Solutions For Tight Spaces
A small kitchen’s worst enemy isn’t the square footage, it’s poor organization. Before tearing out cabinets, maximize existing storage with inserts, wall-mounted racks, and vertical thinking. Pullout organizers inside cabinet doors ($20–50 each) nearly double usable shelf space. Magnetic knife strips on walls ($15–30) free up drawer real estate. Open shelving above the counter costs $50–150 in brackets and lumber and looks deliberately designed rather than cramped.
Look at your layout’s workflow: the “kitchen triangle” (sink, stove, fridge) should flow logically, and your main prep surface should be at least 24 inches wide and clear. If your current layout has the stove and prep area separated by a peninsula or narrow counter, even a simple rolling cart ($40–100) positioned strategically creates additional work surface without remodeling. A wall-mounted magnetic spice rack, hooks for frequently used utensils, and a narrow pantry cabinet on an unused wall add function without visual clutter.
If you’re considering layout changes, moving the sink, repositioning appliances, or adding an island, understand the costs first. Relocating a sink means rerouting supply lines and drain, which typically requires a licensed plumber ($500–1,500 depending on distance and complexity). Moving a gas range requires rerouting a gas line and venting: this is a licensed-professional-only job in most jurisdictions due to safety codes. These projects are structural remodels that justify professional help and likely permit requirements, not DIY weekend affairs.
Budget-Conscious Countertop And Flooring Alternatives
Countertops and flooring are visible, used daily, and expensive if you choose granite, quartz, or real wood. Budget alternatives deliver real durability and style without the $100-plus-per-square-foot price tag.
Laminate countertops have come a long way visually. Modern laminates mimic stone convincingly, resist stains better than they used to, and cost $30–60 per square foot installed. Solid-surface materials like Corian run $50–100 per square foot and offer seam-free aesthetics and repairable surfaces if damaged. If your existing countertop is level and sound, a peel-and-stick adhesive tile backsplash ($50–150 for a 4×8 foot wall) and matching removable countertop coating ($30–80) can completely refresh the look without removal.
For flooring, luxury vinyl plank (LVP) has become the smart budget choice. It’s waterproof, warm underfoot, looks like real wood or stone, and costs $3–8 per square foot installed, a fraction of hardwood or stone tile. Ceramic or porcelain tile remains durable and affordable ($2–10 per square foot) but requires grout maintenance. Polished concrete (if you have a concrete slab) can be sealed and sealed and stained for $1–4 per square foot and reads as deliberately industrial-chic. Avoid cheap vinyl sheet flooring (the single-ply stuff), which shows wear fast and feels cheap underfoot. If installing LVP or tile yourself, rent a wet saw ($40–60 per day) for cuts and spend time on floor preparation, uneven subfloors telegraph through new flooring and shorten its lifespan.
DIY Versus Hiring Professionals: Cost Trade-Offs
Knowing when to DIY and when to hire saves both money and headaches. Painting, hardware swaps, and backsplash installation (if your wall is prepped well) are solid DIY projects for someone with basic tool skills. Surface prep and finishing detail matter more than raw effort, take your time sanding, priming, and caulking, and you’ll get pro-quality results.
Plumbing, electrical work beyond simple outlet or light-fixture swaps, appliance installation (if hardwired or requiring gas connections), structural changes, and permit-required work are not DIY territory unless you’re licensed. A plumber’s hourly rate ($75–150 per hour plus parts) seems steep until you realize that a misaligned or leaking connection can damage drywall, rot framing, and cost thousands in remediation. Similarly, DIY electrical mistakes create fire hazards and void home insurance. HomeAdvisor’s project planning guides break down typical labor costs by task so you can calculate real savings versus risk.
For a budget remodel, consider a hybrid approach: handle cosmetic and finishing work yourself (paint, hardware, backsplash, shelving), and hire professionals for the skilled trades (electrical, plumbing, gas, cabinetry installation). This typically cuts labor costs 30–40% compared to a full-service contractor while keeping you safe and code-compliant. Get three written quotes from licensed, insured contractors before hiring. A quote should itemize labor, materials, timeline, and payment schedule. Lowest isn’t always best: a contractor padding their timeline with expensive change orders will cost more than one quoting accurately at a higher rate.